
Web design new & views.
New article just produced by Envato Tuts+ Tutorials. Without doubt 1 of the most important providers of info available.
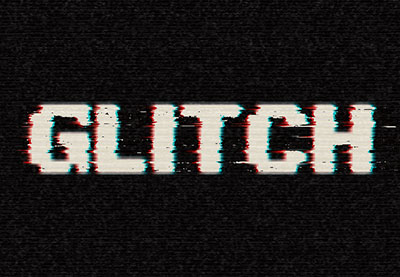
In this tutorial, we will create a VHS-style 3D Photoshop effect for text layers using smart filters, gradient fills, and video overlays.
You can find plenty of Photoshop text actions on GraphicRiver, and if you want to create this 3D text effect in just a few simple clicks, then check my Animated VHS Text Effect Action created the same way.

Tutorial Assets
- Bebas Neue Font or any other similar font you want to use for this effect
- VHS Video Overlay
1. How to Prepare the Document
Step 1
Press Control-N to create a new document and use the following settings:
- 1920 x 1080 px
- 300 dpi

Step 2
Create a new layer using Shift-Control-N and name it “placeholder”.

Step 3
Right-Click on the layer and select Convert to Smart Object.

Step 4
After that, Right-Click > Edit Contents on the “placeholder” layer.

Step 5
Click T to open the Horizontal Type Tool and create any text using the Bebas Neue font with a size of 84 pt. After that, close and save the placeholder.

Step 6
Right-Click on the smart object, select Duplicate, and create two duplicates of the layer.

Step 7
Rename the layer to “text” and “glow” and make the first smart object Invisible.

Step 8
Select the background layer and Fill it with #141414 color using Shift-F5.

2. How to Create VHS Text Effects
Step 1
Now let’s start to create our text effects. Select the “Text” layer and then go to Filter > Blur > Gaussian Blur and set the Radius to 2 px.

Step 2
After that, go to Filter > Blur > Motion Blur and use the following settings:
- Angle: 90°
- Distance: 60 px

Step 3
Go to Filter > Distortion > Wave and use the following settings:
- Number of Generators: 1
- Wavelength: 1 and 298
- Amplitude: 1 and 6
- Type: Sine

Step 4
Now we need to create layer style effects. Double Click on the Layer and then go to Gradient Overlay.

Step 5
Use the following settings for your gradient:
- Blend Mode: Normal
- Opacity: 100%
- Angle: -180°
Set the following colors for your gradient: #fc3d4f ; #fd7335 ; #f57c21.

Step 6
After that, you need to add Gaussian Blur and Wave Effect with the same parameters to the “glow” layer.

Step 7
Double-Click on the layer and add an Outer Glow effect with the same gradient as we use before and the following settings:
- Blend Mode: Screen
- Opacity: 100%
- Spread: 4%
- Size: 12 px

Step 8
Change the Fill setting of the layer to 0%.

Step 9
Select your smart objects while holding Shift, and then hit the Create a New Group icon and name it “Main Text”.

Step 10
Create two duplicates of the group and name them “Color Shift 01” and “Color Shift 02”.

Step 11
Double-Click on the “Color Shift 01” layer and Uncheck the Green and Blue color channels.

Step 12
Double-Click on the “Color Shift 02” layer and Uncheck the Red and Green color channels.

Step 13
Move the “Color Shift 01” group of layers 4 px to the left while holding Shift.

Step 14
Move the “Color Shift 02” group of layers 8 px to the right while holding Shift.

3. How to Create Overlaying Elements
Step 1
Now we need to create “TV Lines” overlay textures. Create a new layer using Shift-Control-N and Fill it with #282828 color.

Step 2
Go to Filter > Filter Gallery > Sketch and select Halftone Pattern. Use the following settings:
- Size: 2
- Contrast: 50

Step 3
Create a duplicate of the layer and then move it 1080 px up while holding Shift.

Step 4
After that, you need to select both of the layers and move them 1080 px up again.

Step 5
Create another duplicate of the “layer 1” and then move it 1080 px down.

Step 6
Select all three layers and Right Click > Merge Layers. Name it “TV Lines”.

Step 7
Change the Blending Mode of the layer to Overlay and the Opacity to 25%.

Step 8
Go to File > Place and then select the MP4 file from the attachment of this tutorial. Resize and rotate it to the borders of the document.

Step 9
Change the Blending Mode of the layer to Screen.

Step 10
Select your overlay layers while holding Shift, and then hit the Create a New Group icon and name it “Video Overlays”.

Step 11
Now we need to create gradient overlays for our video. Go to Layer > New Fill Layer > Gradient and create two gradients. Name them “Light Leaks 01” and “Light Leaks 02”.

Step 12
Double-Click on the first gradient fill in the Layers panel and use the following settings:
- Style: Linear
- Angle: -35°
- Scale: 232%

Step 13
After that, Left-Click on the Gradient in the same panel and create a new gradient with the following settings:
- Color:
#ff7511, Location: 0%; Opacity: 100% - Location: 35%; Opacity: 82%
- Location: 51%; Opacity: 0%
- Color:
#e90f43, Location: 61%; - Location: 67%; Opacity: 82%
- Color:
#f3005e, Location: 100%; Opacity: 100%

Step 14
Double-Click on the second gradient fill in the layer panel and use the following settings:
- Style: Linear
- Angle: -171°
- Scale: 232%

Step 15
After that, Left-Click on the Gradient in the same panel and create a new gradient with the following settings:
- Color:
#315934, Location: 0%; Opacity: 100% - Color:
#ac9102, Location: 100%; Opacity: 100%

Step 16
Change the Blending Modes of both gradients to Color Dodge.

Step 17
Select your overlay layers while holding Shift, and then hit the Create a New Group icon and name it “Light Leaks”.

4. How to Create the Animation of the Layers
Step 1
Now we are ready to start creating our animation. Go to Window > Timeline and click on the Create Video Timeline icon.

Step 2
Reduce the duration of the timeline to 05:00 by moving the icon shown below.

Step 3
Now you need to create the first keyframe. Select the “Text” layer and click on the Timer icon near Transform to create the first Keyframe.

Step 4
Move the Time Indicator to 0:00:00:10 and then move the layer 15 px up while holding Shift.

Step 5
Move the Time Indicator to 0:00:00:20 and then move the layer 15 px down while holding Shift.

Step 6
Select the keyframes we just created while holding Shift and then Right-Click > Copy.

Step 7
Move the Time Indicator to 0:00:01:00 and then hit the Keyframe icon.

Step 8
After that, Right-Click > Paste on the last keyframe to duplicate the keyframes we created before.

Step 9
Create duplicates of the keyframes until you fill the whole timeline.

Step 10
Select all the keyframes of the “text” layer and paste them for the “glow” layer.

Step 11
Select the “TV Lines” layer and click on the Timer icon near Position to create the first Keyframe.

Step 12
Move the Time Indicator to 0:00:05:00 and move the layer 2160 px down while holding Shift.

Step 13
Select the “Light Leaks 01” layer in the timeline panel and reduce the size of the clip to Start: 02:00 and Duration: 02:00.

Step 14
Select the “Light Leaks 02” layer in the timeline panel and reduce the size of the clip to Start: 03:00 and Duration: 02:00.

Step 15
Click on the Transitions icon and select Fade.

Step 16
Drag and drop the Fade transition to the start and the end of the “light leak 01”.

Step 17
Right-Click and change the duration of both Fade transitions to 0.97 s.

Step 18
After that, you need to apply the same transition with the same duration to the second “light leaks” layer.

Step 19
Create a new layer using Shift-Control-N, and then fill it with black color and name it “Fade In/Out”.

Step 20
Change the Fill of the layer to 0%.

Step 21
And finally, Drag and drop the Fade With Black transition to the start and the end of the “Fade In/Out” layer.

5. How to Render the Animation as a Video
Step 1
Our animation is now ready for rendering. Click on the icon in the upper right corner and select Render Video.

Step 2
Set the following settings in the Render Video panel:
- Format: H.264
- Size: Document Size
- Range: All Frames

Awesome Work, You’re Now Done!
Your video is ready! In this manner, we can create an animated VHS text effect in Adobe Photoshop using the smart objects, gradient fills, filters and video overlays.
I hope you enjoyed this tutorial, and if you want to create this effect using Photoshop actions, you can check my Animated VHS Text Effect Action on GraphicRiver, which will help you to create this text effect in a few simple clicks.
-
 GlitchHow to Create an Editable Animated RGB Glitch Effect in Adobe Photoshop
 -
Text EffectsHow to Create an Easy Digital Glitch Text Effect in Adobe Photoshop
-
AnimationHow to Create a Glitch Animated Gif Action in Adobe Photoshop
-
GlitchHow to Create a Set of Glitches in Adobe Photoshop


First seen here: Envato Tuts+ Tutorials
Trust you enjoyed that information that they shared. You could find quite similar blog posts on our main website: https://designmysite1st.com
Leave me your reaction down below, write a quick comment and let us know which topics you would like us to write about in up coming blog posts.