
Web design news bites.
Another post freshly put up by Envato Tuts+ Tutorials. Perhaps 1 of the most reliable suppliers of free written content on-line.

In this tutorial you will learn how to create an amazing, artistic paint drip effect Photoshop action. I will try to explain everything in so much detail that everyone can create it, even those who have just opened Photoshop for the first time.
The effect shown above is the one I will show you how to create in this tutorial. If you would like to create the even more
advanced effect shown below, a sketch with a dripping paint and 3D pop-out effect, using just a single click, then check out my Wet Paint Photoshop Action.

Follow along with us over on our Envato Tuts+ YouTube channel:
What You’ll Need
To recreate the design above, you will need the following photo:
- Stock Image
1. Let’s Get Started
Step 1
First, open the photo that you want to work with. To open your photo, go to File > Open, choose your photo, and click Open. Now, before we get started, just check a couple of things:
- Your photo should be in RGB Color mode, 8 Bits/Channel. To check this, go to Image > Mode.
- For best results, your photo size should be 1500–4000 px wide/high. To check this, go to Image > Image Size.
- Your photo should be the Background layer. If it is not, go to Layer > New > Background from Layer.

Step 2
If you are using a different stock photo from mine, you should firstly follow the Unfinished Coloured Pencil Sketch Effect
tutorial to get a sketch effect that is the base for this effect. Then I
suggest that you merge all sketch layers into one layer named Sketch Effect so that it’s easier for you to follow this tutorial.
If you are using the same stock photo as I do, go to File > Place Embedded, select the Sketch Effect file attached, click Place, and place it so it fits the canvas as shown below:

2. How to Create Brushes
Step 1
In this section, we are going to create brushes that we will need for this effect. Go to File > New to create a new file, name it Dripping Brushes, and use the settings below:

Step 2
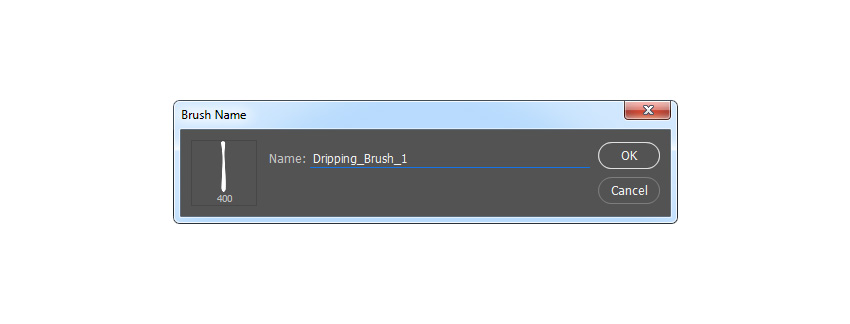
Go to Layer > New > Layer to create a new layer and name it Brush_1. Then, while this layer is selected, choose the Pen Tool (P), select the Shape tool mode, set the Fill color to #000000, and draw a dripping shape. If you prefer some other tools for drawing, feel free to use them.

Step 3
Now go to Edit > Define Brush Preset to define this shape as a brush and name it Dripping_Brush_1.
Step 4
Go to Layer > New > Layer to create a new layer and name it Brush_2. Then, while this layer is selected, draw another dripping shape in the same way and hide the Brush 1 layer.

Step 5
Now go to Edit > Define Brush Preset to define this shape as a brush and name it Dripping_Brush_2.

Step 6
Go to Layer > New > Layer to create a new layer and name it Brush_3. Then, while this layer is selected, draw another dripping shape in the same way and hide the Brush 2 layer.

Step 7
Now go to Edit > Define Brush Preset to define this shape as a brush and name it Dripping_Brush_3.

Step 8
Go to Layer > New > Layer to create a new layer and name it Brush_4. Then, while this layer is selected, draw a drop shape in the same way and hide the Brush 3 layer.

Step 9
Now go to Edit > Define Brush Preset to define this shape as a brush and name it Dripping_Brush_4.

Step 10
Go to Layer > New > Layer to create a new layer and name it Brush_5. Then, while this layer is selected, draw a drop shape in the same way and hide the Brush 4 layer.

Step 11
Now go to Edit > Define Brush Preset to define this shape as a brush and name it Dripping_Brush_5. After that, you can close the Dripping Brushes file window.

3. How to Create a Painting Effect
Step 1
In this section, we are going to create a painting effect from a specific area of the photo. Go to Layer > New > Layer to create a new layer and name it Painting.

Step 2
Now hide the Sketch Effect layer, and while the Painting layer is selected, choose the Brush Tool (B), pick a soft brush, and brush over the areas that you want to turn into a painting.

Step 3
Control-click on this layer thumbnail to make a selection of this layer. Then hide this layer, select the Background layer, and press Control-J on your keyboard to create a new layer using a selection. Show the Sketch Effect layer and drag this new layer just above it in the Layers panel.

Step 4
Now name this layer Subject, go to Image > Adjustments > Shadows/Highlights, and set the Shadows to 20% and the Highlights to 5% as shown below:

Step 5
Press Control-J on your keyboard to duplicate this layer, go to Filter > Sharpen > Sharpen, and then go to Filter > Other > High Pass and set the Radius to 2 px as shown below:

Step 6
Go to Filter > Sharpen > Sharpen again and then press Control-Shift-U on your keyboard to desaturate this layer. After that, change this layer blending mode to Soft Light, Control-click on the Subject layer to select both layers at the same time, and press Control-E on your keyboard to merge these two layers into one layer.

Step 7
Now go to Filter > Sharpen > Unsharp Mask and set the Amount to 100%, Radius to 2.5 px and Threshold to 1 level as shown below:

Step 8
Go to Filter > Stylize > Diffuse and choose Anisotropic Mode as shown below. Then go to Edit > Transform > Rotate 90° clockwise to rotate this layer 90° clockwise.

Step 9
Now repeat the previous filter again, so go to Filter > Stylize > Diffuse and choose Anisotropic Mode. Then go to Edit > Transform > Rotate 90° clockwise to rotate this layer 90° clockwise once more. After that, go to Filter > Stylize > Diffuse and choose Anisotropic Mode for a last time, and go to Edit > Transform > Rotate 180° to rotate this layer 180° and return it to the original position.

Step 10
Name this layer Subject, and then go to Filter > Noise > Reduce Noise and use the settings below:

Step 11
Now we are going to add a contrast to the Subject layer. Press D on your keyboard to reset the swatches, and then go to Layer > New Adjustment Layer > Gradient Map to create a new gradient map adjustment layer and name it Subject_Contrast.

Step 12
Press Control-Alt-G on your keyboard to create a clipping mask, and then change this layer blending mode to Soft Light and set the Opacity to 35%.

Step 13
Go to Layer > New Adjustment Layer > Hue/Saturation to create a new hue/saturation adjustment layer and name it Subject_Saturation.

Step 14
Press Control-Alt-G on your keyboard to create a clipping mask, and then Double-click on this layer thumbnail, and in the Properties panel enter the settings below:

Step 15
Now go to Layer > New Adjustment Layer > Levels to create a new levels adjustment layer and name it Overall Brightness.

Step 16
Press Control-Alt-G on your keyboard to create a clipping mask, and then Double-click on this layer thumbnail, and in the Properties panel enter the settings below:

Step 17
Now select the Subject layer, and then hold the Alt button on your keyboard and drag this layer just above the Subject_Brightness layer to duplicate this layer and place it on top of the visible layers in the Layers panel. Then go to Filter > Other > High Pass and set the Radius to 5 px as shown below:

Step 18
Press Control-Alt-G on your keyboard to create a clipping mask and then press Control-Shift-U to desaturate this layer. After that, change this layer blending mode to Hard Light and name it Subject_Sharpening.

4. How to Create the Paint Drops
Step 1
In this section, we are going to create the paint drops using the brushes that we made in the beginning of the tutorial. Go to Layer > New > Layer to create a new layer and name it Paint Drops.

Step 2
Now you need to decide where you are going to place the first dripping brush. After that,
using the Eyedropper Tool (I), click on the area of your subject where the drop will start to drip from to set that color as your foreground color, choose the Brush Tool (B), pick some of the dripping brushes, and position them where you want.

Step 3
Repeat
the same process to create more paint drops. Keep changing the brushes and brush size to get a diverse effect. Here is my
result:

Step 4
Now go to Layer > Layer Mask > Reveal All to create a blank layer mask. Then press D on your keyboard to reset the swatches and then X to invert them. After that, choose the Brush Tool (B), pick a soft brush, and brush over the top area of paint drops where needed to make them better blend with the subject.

5. How to Create a Vignette
Step 1
In this section, we are going to create a vignette effect. Go to Layer > New > Layer to create a new layer and name it Vignette.

Step 2
Press D on your keyboard to reset the swatches, go to Edit > Fill, and set Contents to Foreground Color, Mode to Normal and Opacity to 100% as shown below:

Step 3
Now press Control-A on your keyboard to make a selection of the canvas and go to Layer > Layer Mask > Hide Selection to create a layer mask that hides the selected area of the layer. Then click on the link icon between the layer mask and layer thumbnail to unlink them.

Step 4
While the layer mask is selected, press Control-T on your keyboard to transform it, and set Width and Height to 85% as shown below:

Step 5
Now go to Filter > Blur > Gaussian Blur and set Radius to 100 px as shown below:

Step 6
Set the Opacity of this layer to 20%.

6. How to Create a Color Look
Step 1
In this section, we are going create a color look. Go to Layer > New Adjustment Layer > Curves to create a new curves adjustment layer and name it Color Look.

Step 2
Now Double-click on this layer thumbnail, and in the Properties panel make the settings below:

You Made It!
Congratulations, you have succeeded! Here is our final result:

If you would like to create the even more advanced effect as shown below, a sketch with a
dripping paint and 3D pop-out effect, using just a single click, then
check out my Wet Paint Photoshop Action.

Originally posted here Envato Tuts+ Tutorials
Hope you valued the content that they shared. You’ll find quite similar articles or blog posts on our main site: https://designmysite1st.com
Leave me your reaction down below, share a quick comment and let me know which subjects you would like covered in our blog posts.